If you use groups in your Canvas courses, you may have noticed that it’s not currently possible to export group data into a CSV file. However, this functionality is available through iPeer. Whether or not you’re currently using iPeer, you can use this tool to import your Canvas student groups and then export the groups to a downloadable CSV file. Your exported CSV will include group name, group number, student name, and student number. This workaround is outlined below.
Note: You can skip Steps 1 and 2 if you already have iPeer synced with your course.
Step 1: Log into iPeer
If this is your first time using iPeer, you can request access by contacting UBC iPeer support: ipeer.support@ubc.ca. Please specify the course subject, course number(s), section(s), and term (e.g., 2018S1) when submitting your request.
If you’ve used iPeer in a previous course, you can log into ipeer.elearning.ubc.ca directly with your CWL.
Step 2: Sync your Canvas course with iPeer
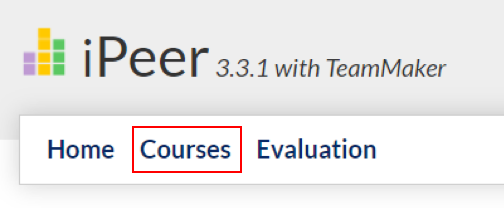
- Log into iPeer and click the Courses tab at the top of the page.
- Click +Add Course Based on Canvas on the top right-hand corner.
- From the Add Course page, select the Canvas course you would like to sync with iPeer and click Next.
- You will be asked to provide information about the course (e.g., title, instructor). Input this information and click Save to sync your course.
Step 3: Import Canvas student roster into iPeer
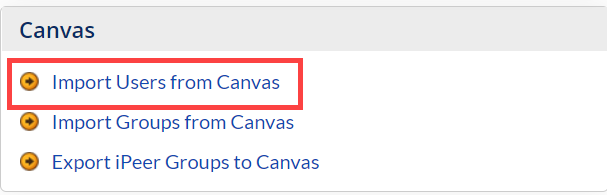
- To import your Canvas student roster into iPeer, navigate to the Canvas menu in iPeer and select Import Users from Canvas.
- Choose the Canvas course you would like to import the students from and click Import.
Step 4: Import Canvas groups into iPeer
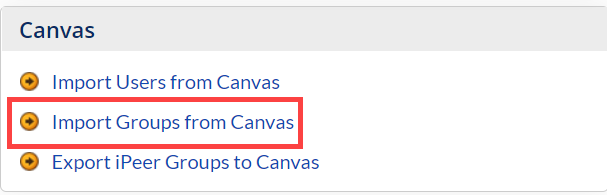
- 1. To import student groups created in Canvas into iPeer, select Import Groups from Canvas from the Canvas Menu.
- Select the iPeer/Canvas course you are importing from and which Canvas Group set you want to export the groups from and click Import.
Step 5: Export Canvas groups to a CSV using iPeer
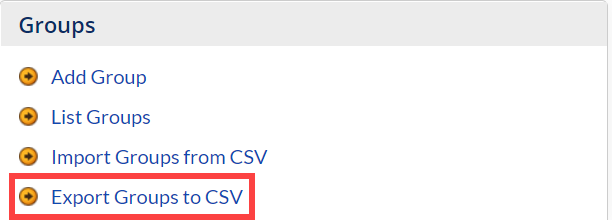
- From the Groups menu in iPeer, select Export Groups to CSV.
- Create a filename for your CSV file.
- Select the fields you would like to see in the Export Group Fields section.
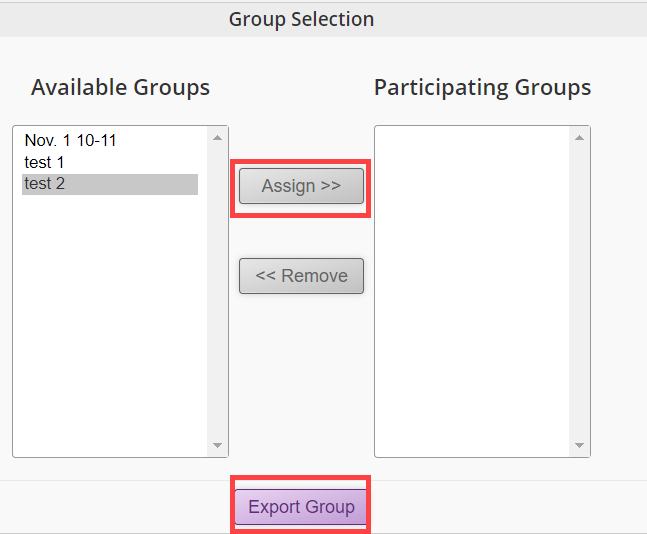
- Choose the groups you would like to export by selecting the group name in the Available Groups column, and clicking Assign >> to bring it to the Participating Groups column.
- Once you’ve selected the groups you wish to export, click Export Group (located at the bottom of the page in purple). The selected groups and their corresponding information will now be exported to a CSV file.
Last updated: January 17, 2020 by Lauren Lavoie, Faculty of Science.